
As your trial period ends, we invite you to upgrade to our paid plan for even more features and benefits. Our flexible pricing options and secure payment page make it easy to get started. We're excited to continue supporting your business and helping you achieve your goals!
Steps to Upgrade Your Plan
Step 1
Log in to Admin Dashboard > Settings > Billing.

Step 2
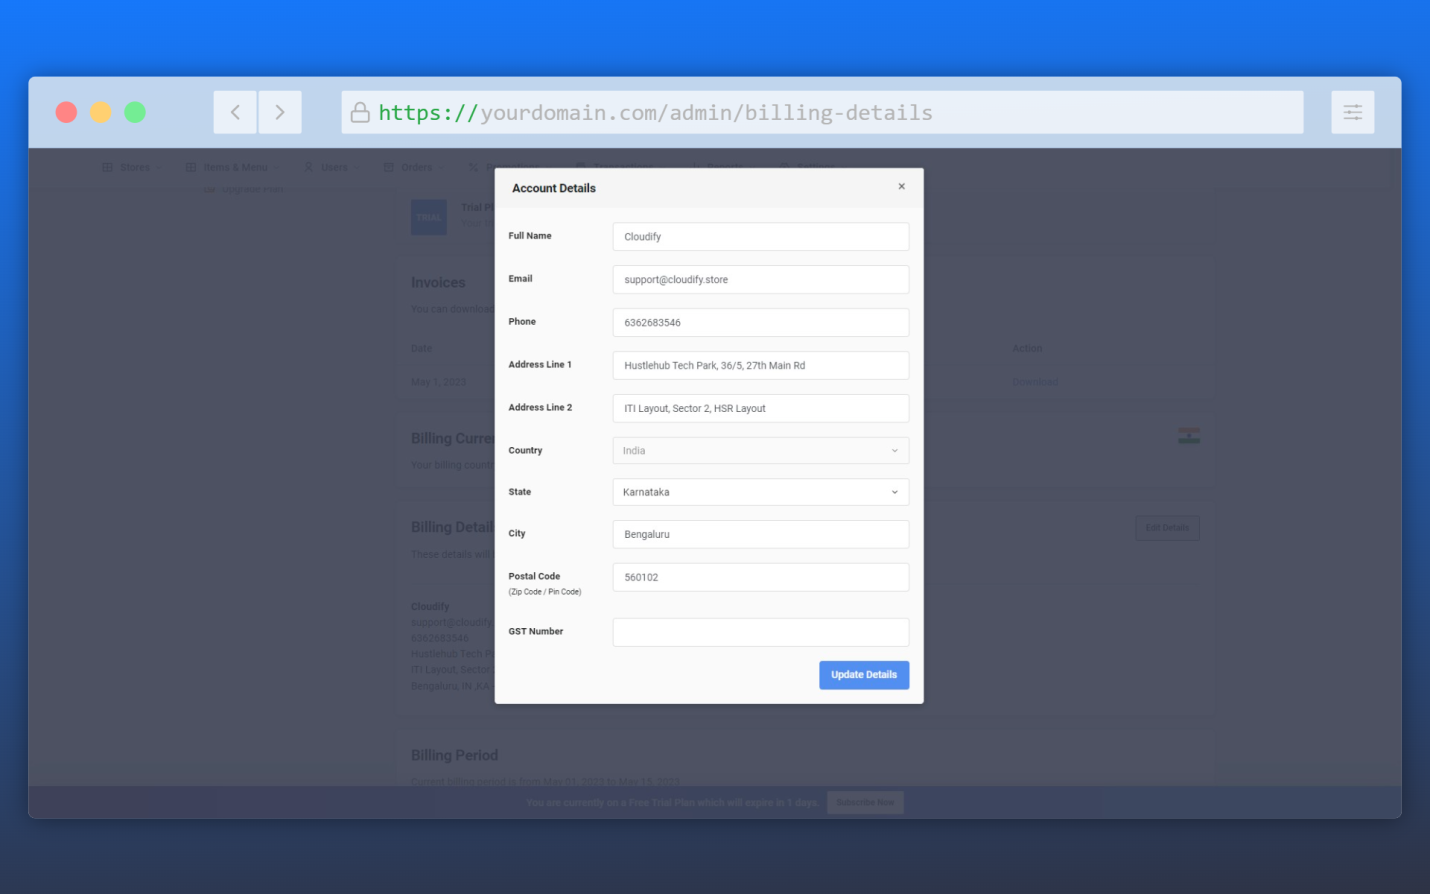
Before upgrading plan, make sure you have added your billing details or if you need to update your billing details, click on "Edit Details" and make the necessary changes.
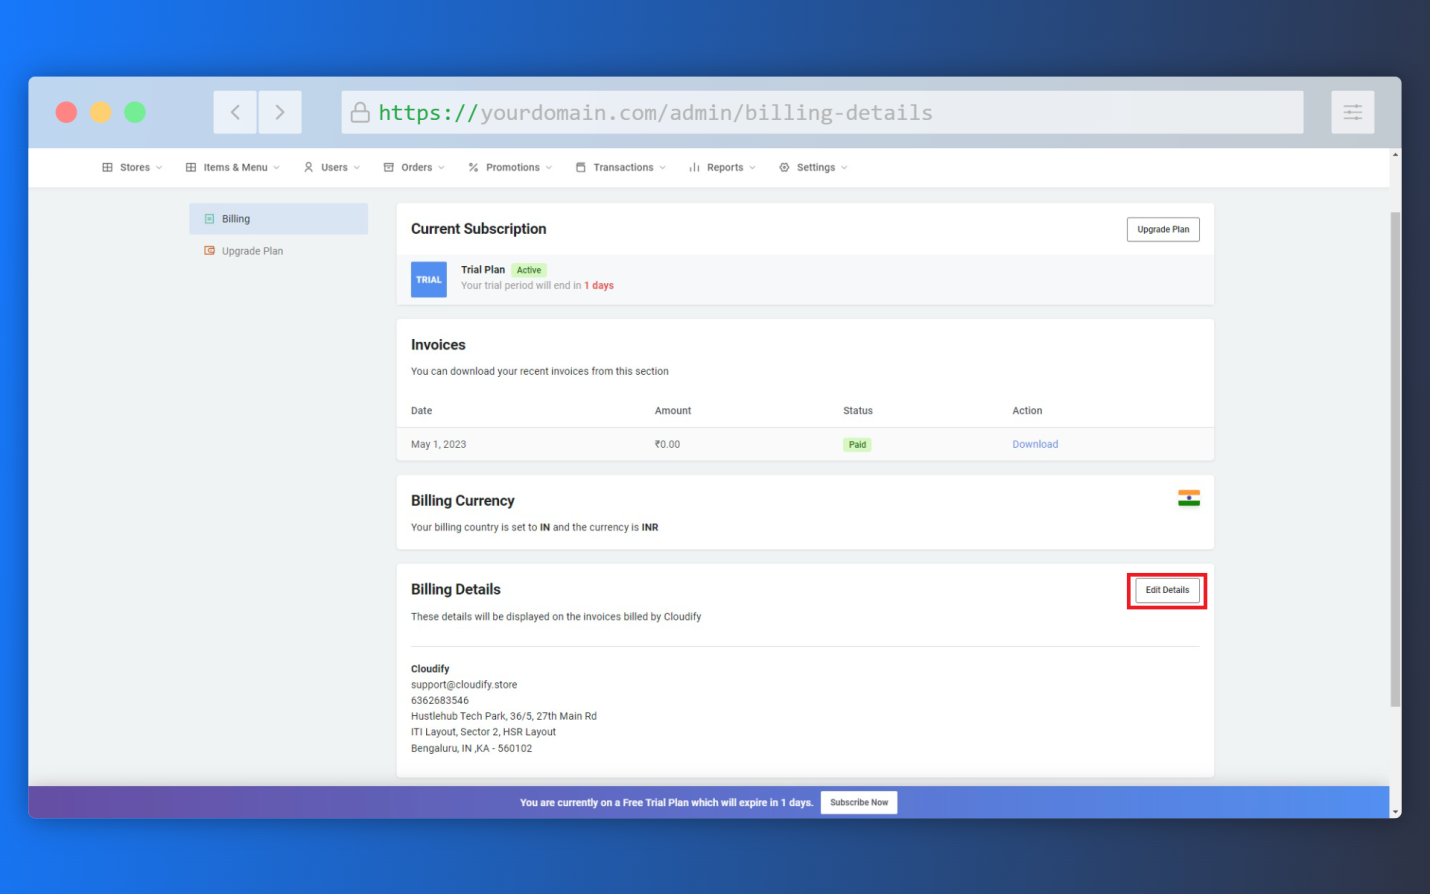
- Confirm that your billing details (e.g. name, email, phone, address) are correct and up-to-date.
- Click "Update Details" when you're done.
Step 3
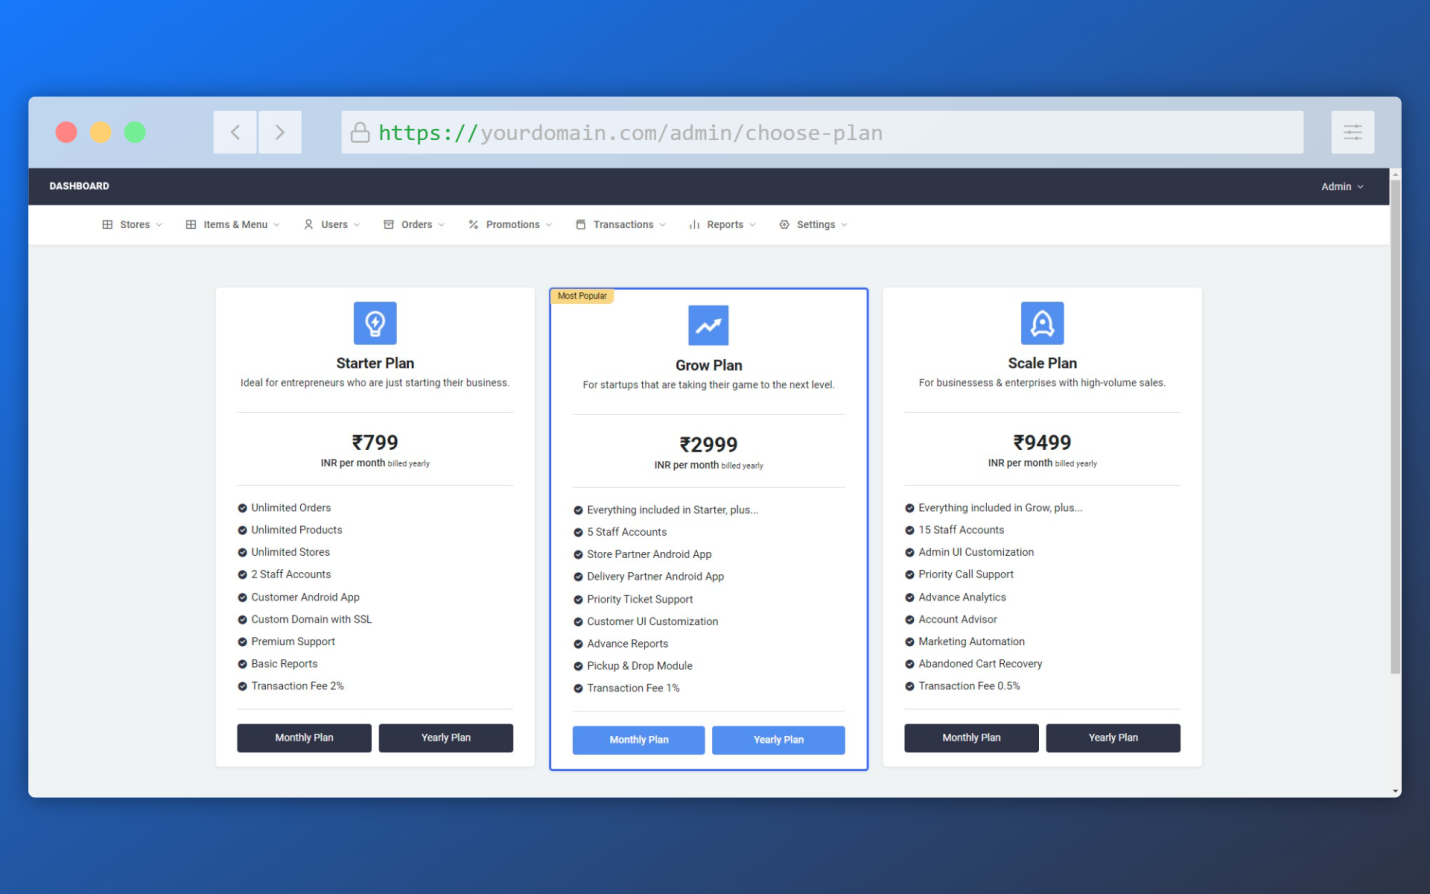
Click on "Upgrade Plans" in the Current Subscription Section.
Step 4
- Select the plan you want to upgrade to and click "Upgrade".
- Here I’m selecting “Scale – Yearly Plan” – which is the top plan in Foodomaa.
Step 5
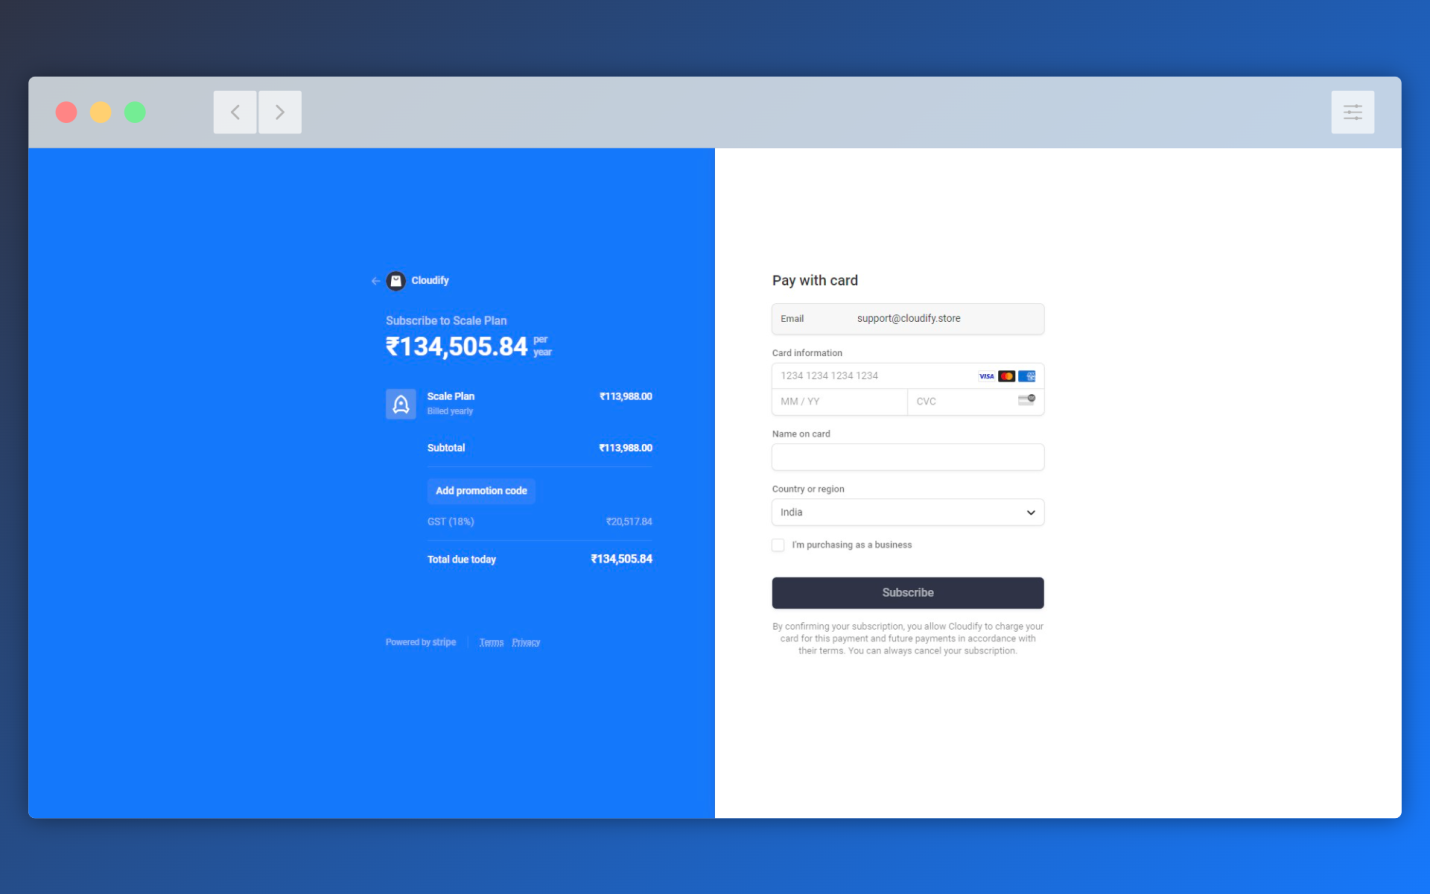
- After selecting the plan you want to upgrade, you'll be taken to the payment page.
- Enter your payment information (e.g. credit card number, expiration date, security code).
- Click "Subscribe" to complete the payment process.
Plan Successfully Upgraded
After completing your payment, you'll be redirected to the billing page. You can download your Invoice here by clicking the download button.

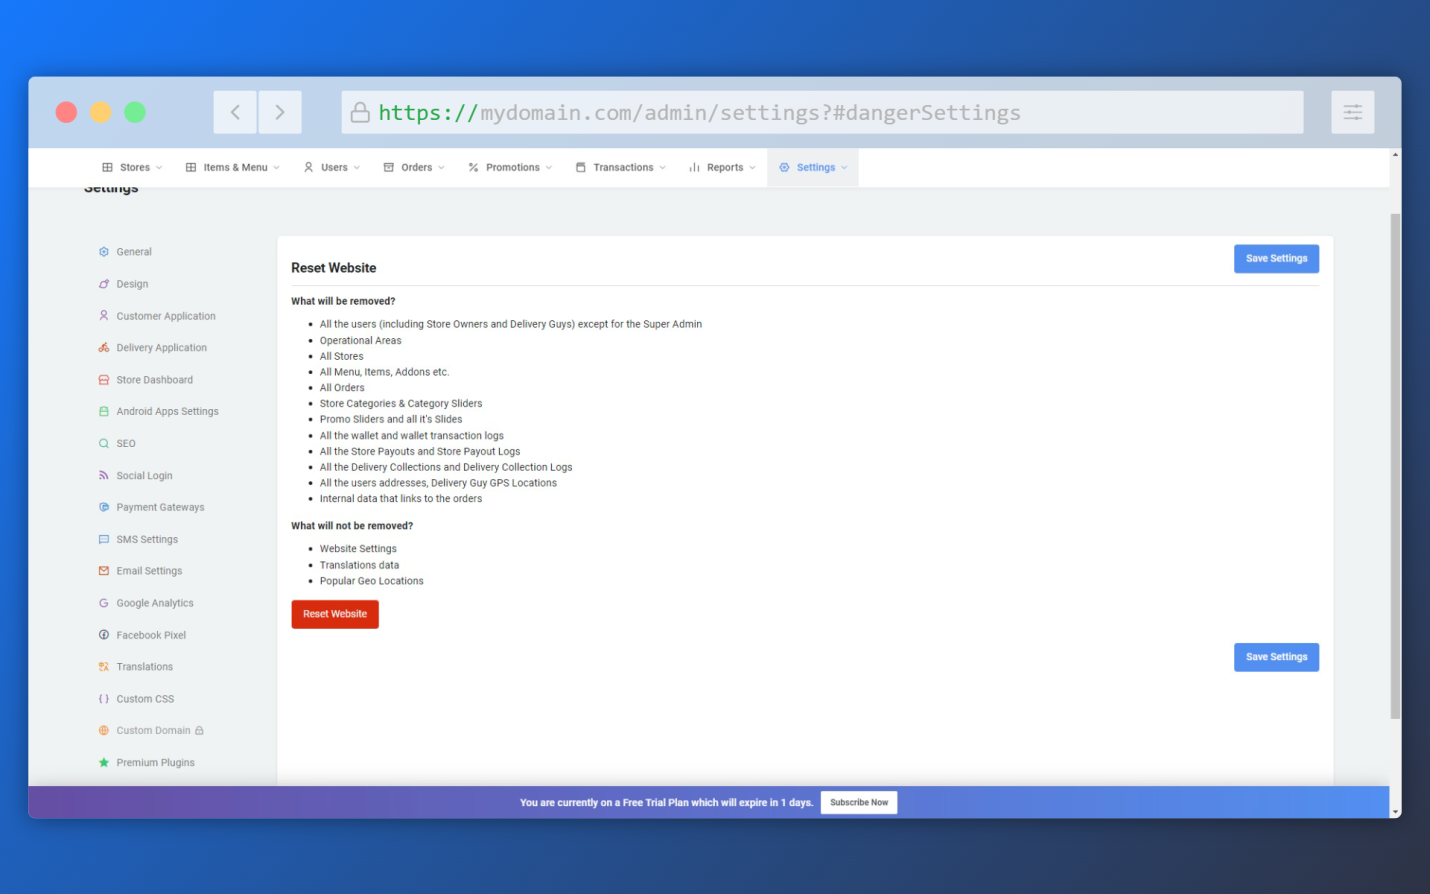
Reset Your Store to Delete Demo Data
Before adding your own data to the platform, it is important to delete the provided demo data. This ensures a clean starting point for your operations and avoids any confusion or overlap. Removing the demo data streamlines your processes and allows you to manage your own information efficiently within the platform. Take this step to maintain a focused workflow and ensure that the data in the store aligns with your specific needs.
Go to Admin Panel > Settings > All Settings > Danger Zone.
Click on "Reset Website" and type CONFIRM to perform the action.
Setup Google Maps for Your Business.
The Google Maps API is crucial to set up before starting a hyperlocal delivery business. It offers a range of essential services such as geocoding, interactive map embedding, nearby places information, elevation data, static map generation, geolocation tracking, and distance matrix calculations. These functionalities enable businesses to accurately identify locations, visualize service areas, optimize routes, display customized maps, track users, and estimate travel distances. By leveraging the Google Maps API, hyperlocal delivery businesses can ensure efficient and seamless operations, enhancing the overall customer experience.
Step By Step Guide.
Go to Google Cloud Console and log in with your Google Account or create an account.
Create a Project on Google Cloud Console.[IMPORTANT]
Step 1
You will have to set up two billing accounts :
- Google Cloud Billing Account.
- Google Maps Billing Account.
Step 2
Enable the following APIs on your project:
- Geocoding API
- Maps Javascript API
- Places API
- Maps Elevation API
- Maps Static API
- Geo Location API
- Distance Matrix API
From the Left menu, go to API & Services > Credentials and click on `Create Credentials
Step 3
- Create a Key named HTTP Key and under the website restrictions tab add your website URL like the following :
If your website is my-domain.com add both: (Note : Make sure that you have change my-domain.com to your domain name)
https://my-domain.com/*
https://www.my-domain.com/*
Make sure you add an asterisk (*) at the end of the URL.
- Create another key named IP Key and under the IP Addresses section add this IP address: 43.205.169.219
- Create another key named No Restriction Key and select None & Save.
- Go to Admin Panel > Settings > All Settings > Google Maps
- Paste all your 3 keys here in respective fields.
- Click "Save Settings” when you're done.
How to Connect Your Custom Domain?
Go to Admin Panel > Settings > All Settings > Custom Domain.
For more detailed instructions on buying and connecting a custom domain with your Foodomaa Store
Pickup Drop Feature.
The "Pickup & Drop" feature in hyperlocal delivery refers to a functionality that allows customers to schedule the pickup and drop-off of items through an online platform. It enables customers to provide pickup and drop addresses, contact details, task details (item categories), and custom messages. The feature calculates dynamic delivery charges based on configurable parameters. Customers can review their order on a cart page and proceed to checkout with various payment options.
Read Article on Steps to enable Pickup Drop Feature
Read More on the flow of Pickup and Drop Module.
Translate to make it Local.
Translating the customer app to the local language in a hyperlocal delivery app offers two key benefits. Firstly, it improves the user experience by removing language barriers and making the app more accessible. Secondly, it expands the app's reach by attracting a broader audience and tapping into new markets. Ultimately, this localization effort demonstrates a commitment to personalized and inclusive customer experiences, leading to stronger connections and increased app success.
To add New Language for translations follow these steps:
Go to Admin Panel > Settings > All Settings > Translations.
Refer to this article from help centre for step by step guide on supporting Multiple language in Cloudfify.
Advanced Customisation (Using CSS)
At Foodomaa, we understand that every business is unique and has its own branding and style. That's why we offer a powerful feature called Custom CSS, which allows you to customize your website even further.
Go to Admin Panel > Settings > All Settings > Custom CSS.
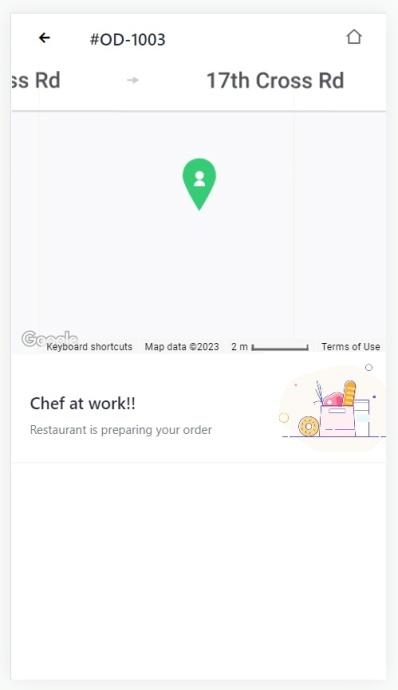
Here are two examples of how Custom CSS can be used for Customer App:
To change the "Preparing Image" - (Based on the image size, the Padding value needs to be adjusted)
img[src="/assets/img/order-preparing.gif"] {
    width: 0;
    height: 0;
    padding: 20px 30px;
    background: url(https://cdn.dribbble.com/users/590596/screenshots/6200385/a--_converted_.gif);
    background-size: cover;
    transform: scale(2.5);
    background-repeat: no-repeat;
    border-radius: 0 !important;
}
To change the Empty Cart Image - (Recommended Image dimension: 512x512)
.cart-empty-img {
    width: 0;
    height: 0;
    padding: 150px;
    background: url(https://cdn-icons-png.flaticon.com/512/7486/7486747.png);
    background-size: cover;
    background-repeat: no-repeat;
}


